Create and Publish an Agent
This guide uses the five-step CSGClaw setup. OpenClaw, code agents, and workflow agents have their own forms. Prepare a name, test questions, an available model, and access to the required resources.
1. Basic information
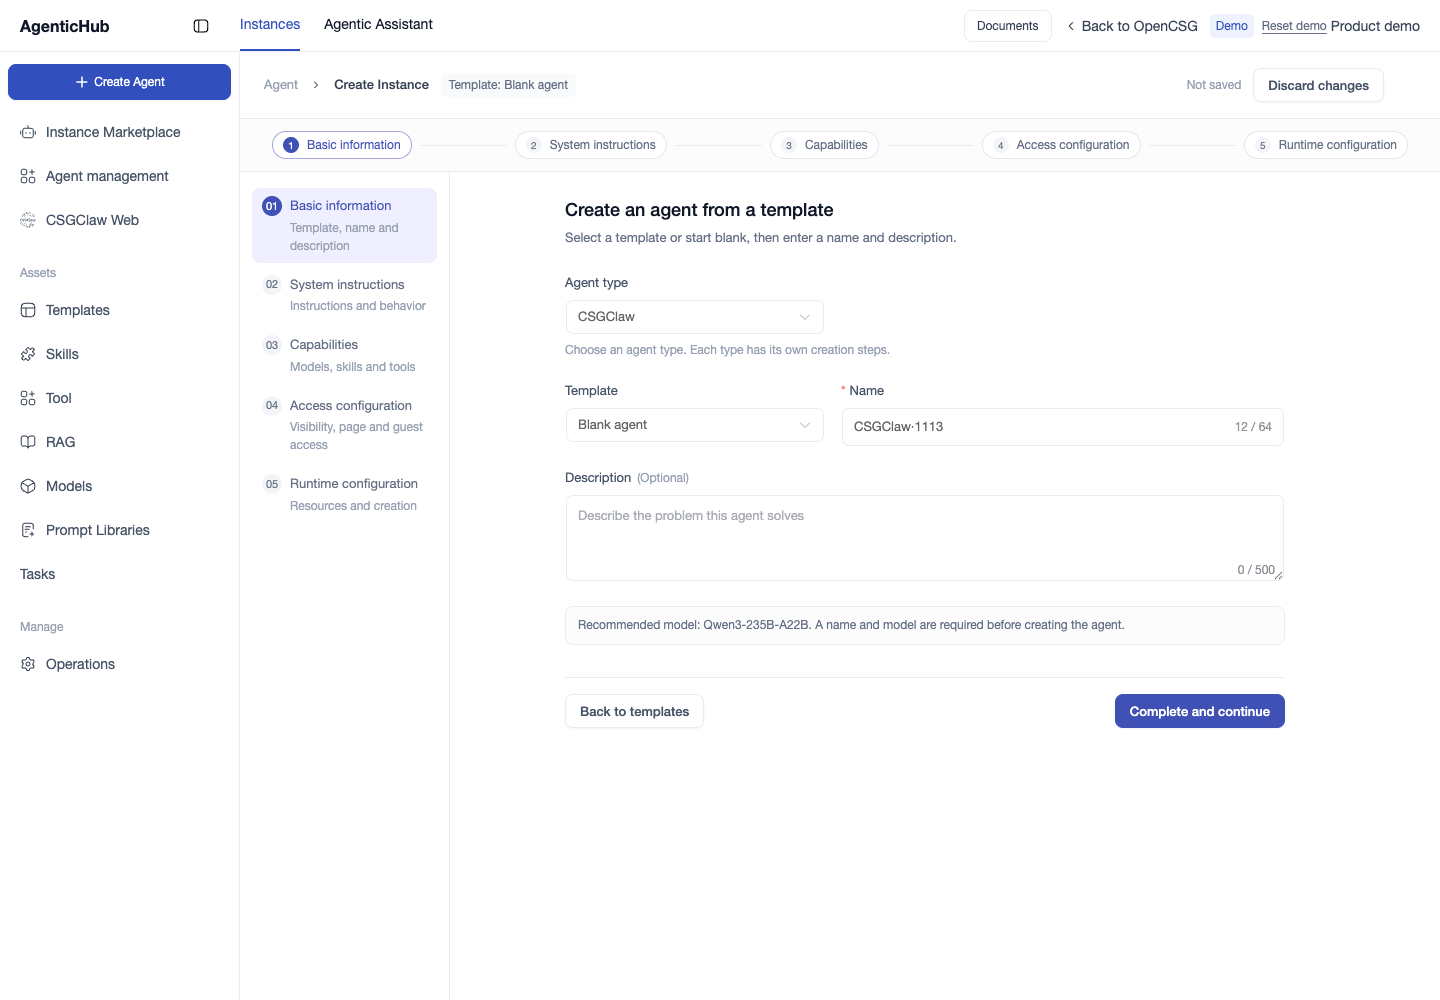
Open Instances → Create Agent. Select an available template or start from a blank agent. Check the template type and review status. Enter a name of up to 64 characters and describe the intended users, task, and output in up to 500 characters. Select Complete and continue. Correct any required fields before advancing.
2. System instructions
Review the template's system instructions. Specify the agent's role, source rules, output format, and what to do when evidence is missing. Review the Markdown preview and confirm that the instructions describe the intended behavior.
3. Capabilities
| Setting | What to check |
|---|---|
| Conversation model | Available to this account and suitable for the task |
| Reasoning effort | Supported by the model and appropriate for response time and quality |
| Skills | Applicable to the input and expected output |
| Tools | Connected, enabled, and authorized for the intended action |
| Knowledge bases | Documents processed or Wiki published, with access granted |
Review the selected resources. Read-only resources inherited from the template are retained. Refresh the list, verify access, or remove an unavailable optional selection.
4. Access
Choose public or private access. Use the default domain or enter a custom subdomain when supported. A custom prefix can use lowercase letters, digits, and hyphens, must start and end with a letter or digit, and can contain up to 63 characters. Selecting a custom page enables public access. Choose the owner and a deployed application space. Choose whether visitors must sign in, can send a limited number of messages, or can continue without signing in.
5. Runtime and publication
Choose shared runtime resources or a dedicated runtime as supported. Confirm the region, available resources, and storage mode. Read-only execution does not attach persistent storage. Read-write execution supports persistent files. Select an available compute resource and review the summary. Select Confirm Publish. If template review is still running, wait and use Retry Creation as directed. Verify an unconfirmed creation result before submitting again.
6. Verify the published agent
Open the new agent from Agent Management when it is ready. Send a known question, then a request that requires a configured resource. Check the response and tool results. Open the published address as the intended user and as an unauthorized user. If guest access is enabled, also verify the sign-in or quota behavior. See instance management and access and sharing.
Two-step standalone demo
The newer standalone demo uses Compose Agent → Publish and Deploy. In Compose Agent, enter the name and instructions, choose a model, and attach skills, tools, or knowledge. Continue to Publish and Deploy, where you set visibility, review channels, and choose the deployment resource option. Save or publish to see the simulated result. Use the target portal's flow for a real deployment.